How to mark an image as AI-generated
How to tag an image generated by AI to inform your readers about its origin.
Many publishers use AI-generated pictures to illustrate their posts. I tried to generate unified images for my travel blog a while ago. While that wasn’t very successful, it showed the potential.
But how would one highlight that AI generates images, especially photo-realistic ones?
The rules for tagging AI pictures are not as well defined as those from Wikimedia images. However, you can still apply some of the elements and features for image captions to mark AI-generated images or even store the prompts for internal use.
Table of contents
Do I need to tag AI-generated images?
I am not aware of a general worldwide rule about tagging AI images. Since each piece of legislation might have different rules, I can only give you advice I never liked to read: talk to a lawyer.
The rule I follow is to mark AI-generated images when they could be confused with reality. For example, when they look like a photo or in the style of a known artist. For other images, I might share the information that they were AI-generated just for informational purposes and if it fits the context.
An example
 AI-generated by Flux Ultra
This is not the real Donald Trump holding the WordPress logo owned by the WordPress Foundation. I’d always make it clear that such an image is AI-generated.
Generated by Flux Ultra. Prompt: A picture of a former US president holding the WordPress logo
I tried a similar prompt in ChatGPT, which generated an image I might not highlight as AI-generated, even though the prompt suggested it.
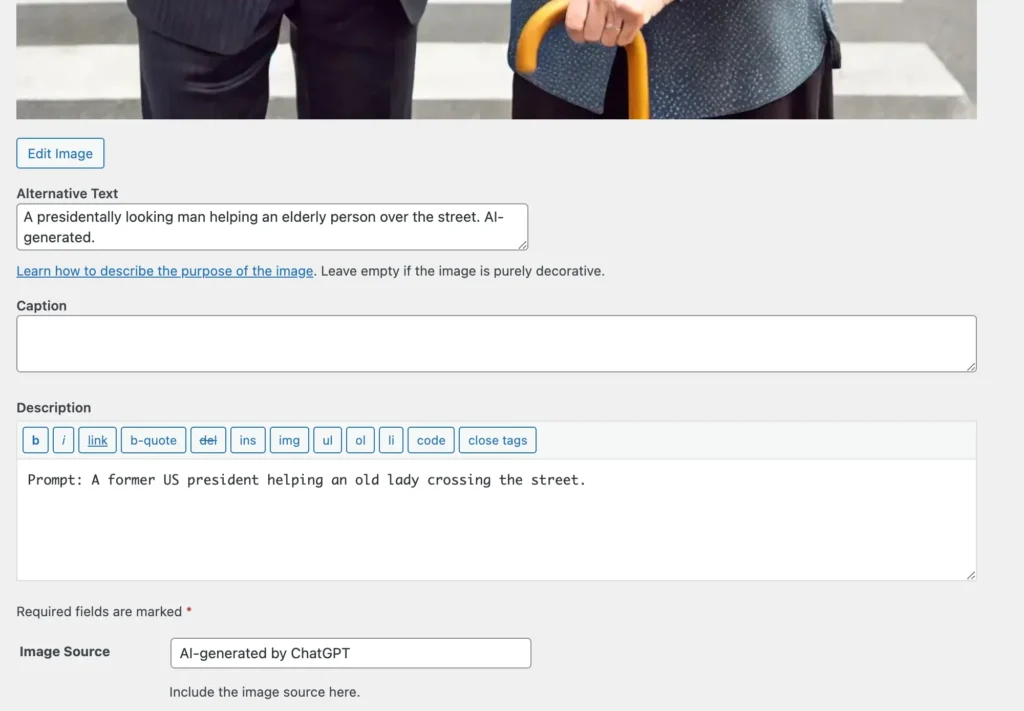
 AI-generated by ChatGPT
Generated with ChatGPT (DALLE). Prompt: A former US president helping an old lady crossing the street.
Even though I mentioned a former president, the person in the AI-generated image does not resemble any former president. Unless I claimed it to be one, I would not necessarily mark it as AI-generated primarily if it was used for decorative purposes.
Notably, some AI image generators have measures against generating photo-realistic images for real persons.
Let’s look at how to mark AI-generated images and photos on our WordPress site.
Tags to describe AI images
Here are a few suggestions for tagging AI-generated images. These tags not only clarify the image’s origin but also serve as useful keywords for organizing your media library:
AI-generated image– A clear and straightforward indication that the image was produced by artificial intelligence.Created with ChatGPT/DALLE– Specify the tool or generator to add transparency.Digital art via AI– Emphasizes the creative process behind the image.Machine-made visual– A slightly more artistic take on AI creation.
Using these tags makes it easier for visitors and content managers to identify and categorize AI-generated images.
Marking AI images
Text around the image and WP caption
For a simple, one-time use of AI-generated images, you can follow my example above and add information about their source to the content next to the image.
One can also use the caption for this.

As you might know from some of my other posts, the WordPress caption is not synchronized. A different one could be displayed in each post in which an image is used. Use the image overlay by Image Source Control to synchronize your captions.
Image overlay
Use Image Source Control to manage all image captions in one place and choose between various output formats and layouts.
Enter die caption text into the Image Source field in the WordPress editor.

The entered text could appear as an overlay above the image, as a list of all photos at the bottom of a post or on a dedicated page.

For further information on display options, see image caption and global list.
Mention in the filename
While not a user-friendly nor legally advised solution, you could add something like ai-generated to the filename. This way, it will be stored even when someone sees the image out of the context of your website.
This is a good additional way to tag AI-generated images.
Storing AI prompts
I often like to store the prompts I used to generate images with AI. Ideally, I do this close to the image so it doesn’t get lost.
DALLE: in the filename
Conveniently, the image generator DALLE, included in ChatGPT, adds the beginning of its internal prompt to the file name.
The original filename of the second image above was this:
DALL·E 2025-01-30 15.40.34 - A former U.S. president, dressed in a formal suit, kindly helping an elderly woman with gray hair and a cane cross a busy city street. The president h.webp
As you can see, this derives from my own shorter prompt since DALLE improves it on the fly to create better results.
For this article, I kept most of the original filename of that image in this article. Usually, I would shorten it significantly and choose a shorter name.
WordPress image description
If you don’t have another reliable storage for AI-generated images and their prompts, you can store them in the Description field in the media library. This field is for informational purposes only and is not displayed in the frontend.
Tagging AI images internally
Instead of just showing that an image was AI-generated in the frontend, you might also want to find AI images quicker in the media library.
The WordPress media library does not have a natural tagging mechanism, so I would not use a plugin or custom code to add one if it is not needed regularly.
If you added a specific string to the image title, image filename, or description, you can use the internal image search using these strings. For example, searching for “prompt” or “AI-generated” would bring you closer to finding AI-generated images.

Conclusion
I hope the insights in my tagging practices gave you an idea of when and how to mark AI-generated images.
If you find sharing that whole prompt with your audience too much, use WordPress’s options to store it for later reuse.
When displaying the AI tag, it becomes handy to store it in a central location and style it using the options in Image Source Control. And while you have the plugin installed already, you might want to check for unused images to clean up your website.

Questions? Feedback? How can I help?
Reach out directly via the contact form.